

HOW TO REPLACE THE DEVELOPING ASSEMBLY ON CANON IRA C5030/C5035/C5235/C5240
Unsure how to replace the Canon developing assembly? We'll show you step-by-step how to do this necessary maintenance to keep your unit running smoothly and keep your machine in top shape.
The following tutorial is for these models:
- Canon imageRunner Advance C5030, C5035, C5045, C5051, C5235, C5240, C5250, C5255
When Do You Need to replace the developing assembly?
If you're getting error messages, this may indicate it's time to replace the developers. Listed here are all the errors that indicate a problem:
- Repetitive defects
- SIngle or multiple stripes run across page
- In/Out density difference
- Toner droplet contamination
- Developer end of life
Step-by-Step Guide: Replacing the Developing Assembly
Prior to starting, it is imperative to remember power off the device and disconnect from its power source at the back.
This step-by-step tutorial will further break down the steps to remove and replace Canon IRA C5030 Developing Assembly. Let’s begin!
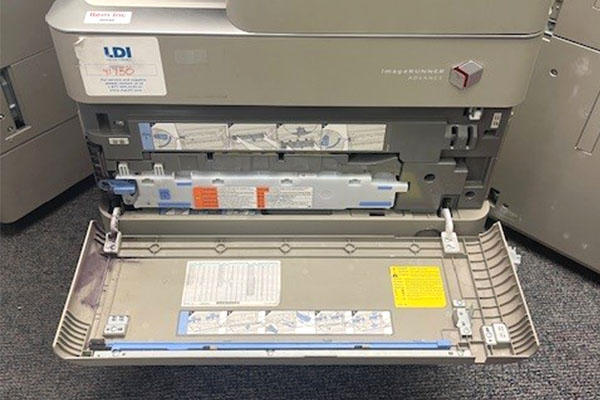
Step One: Open Front Door
To begin, open the front door as the initial step.

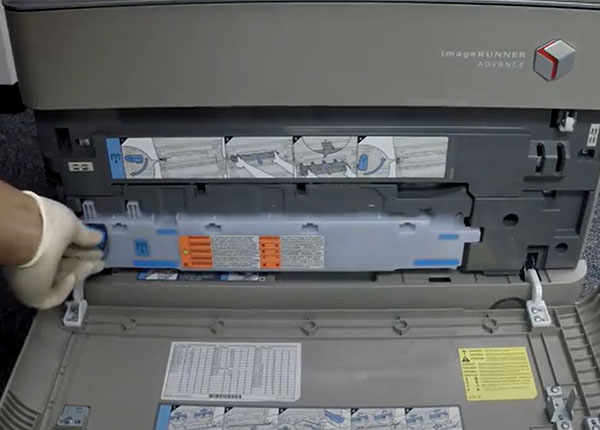
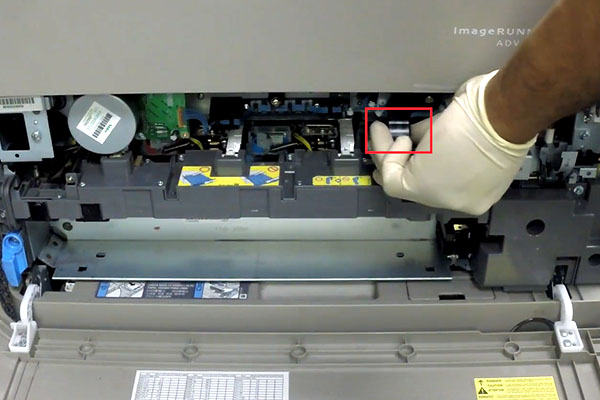
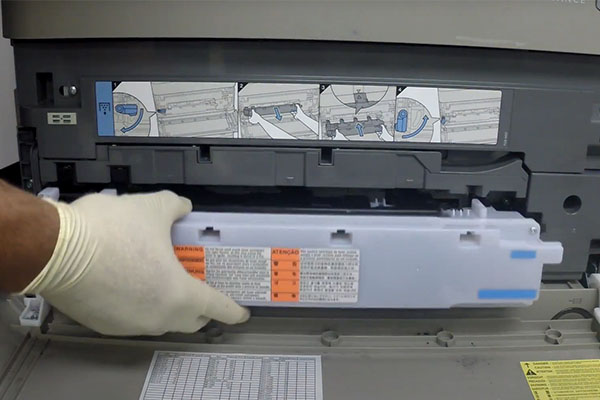
Step Two: Remove Waste Container
After opening the front door, remove the waste toner container by turning lever on the left to unlock. Container should come straight out.
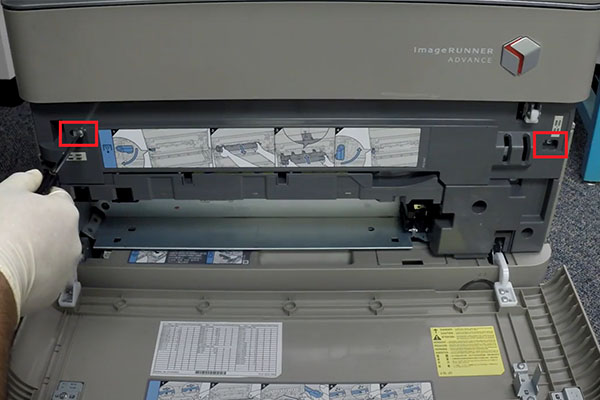
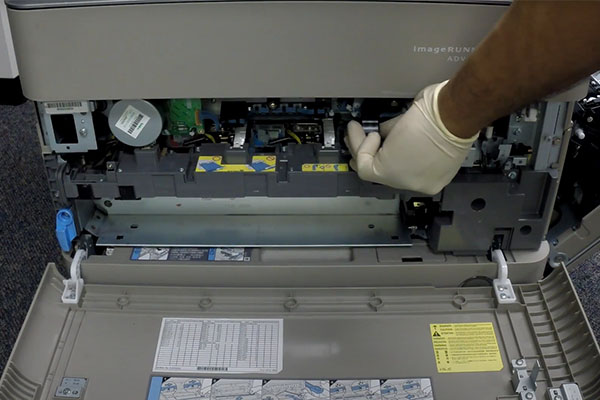
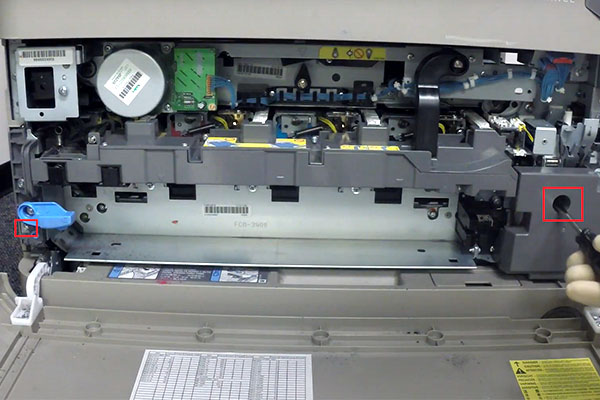
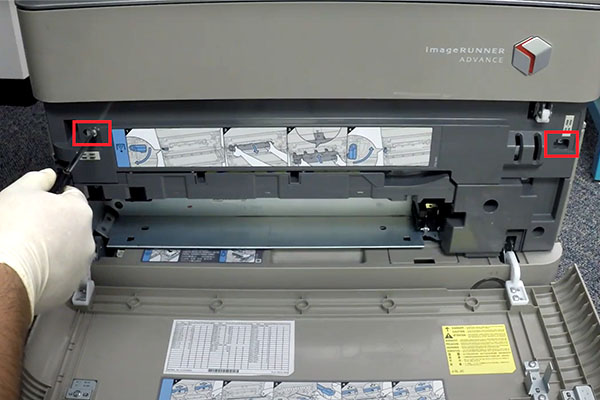
Step Three: Remove IBT Cover
To remove the IBT cover, remove screws on the left and right side. The cover should slide to the right and out.
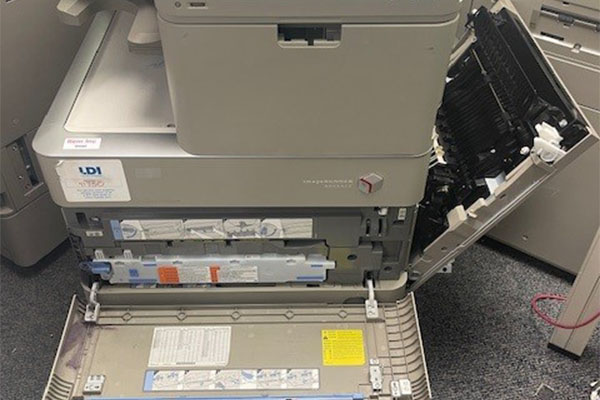
Step Four: Open Right Side Door
Now, let us proceed by opening the door on the right-hand side.
Step Five: Release IBT Lever
Then, proceed by turning the IBT lever up to release the pressure off the belt.
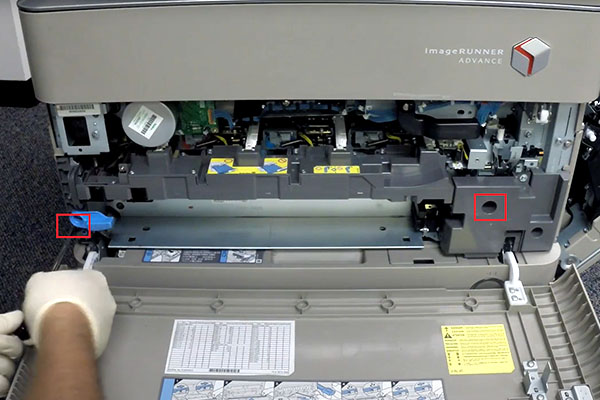
Step Six: Removing screws from Process Unit
Two screws are holding the process unit. Find and remove the screws on both the right and left sides.
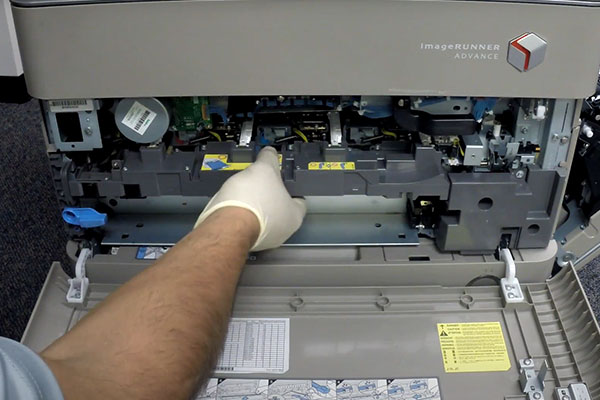
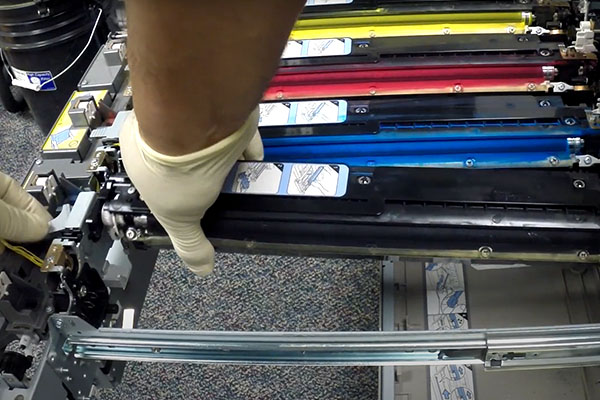
Step Seven: Pull Process Unit Out
Carefully pull the process unit out.
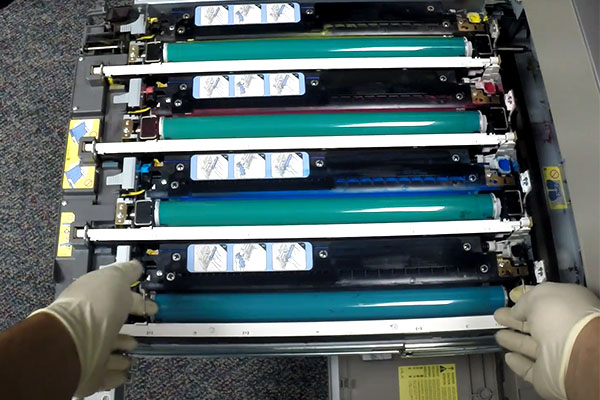
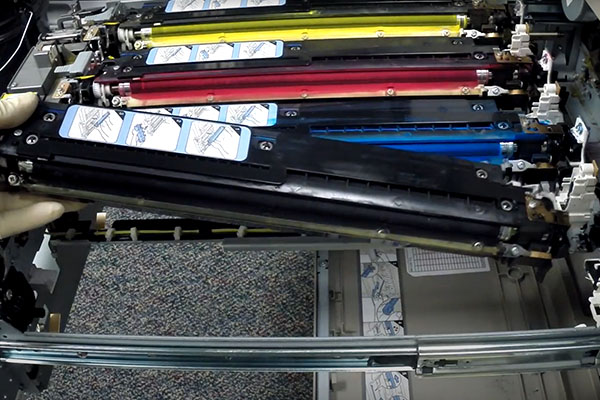
Step Eight: Remove Drum Units
Pull up the two metal tabs, you will feel a little difficult to remove but it is acceptable to apply upward force. The presence of slight pressure is attributed to the springs on the developer assembly.
NOTE: Be mindful that exposure to light can result in damage to the drum units. To prevent such damage, it is recommended to either shield the units with a layer of thick, dark plastic or store it in a location such as a drawer to avoid any light.
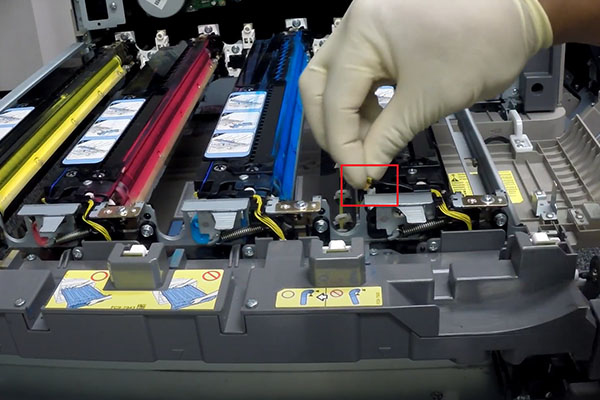
Step Nine: Disconnect Developer Harness
Next, proceed by disconnecting the developer harness. Carefully guide the harness across the designated harness guides.

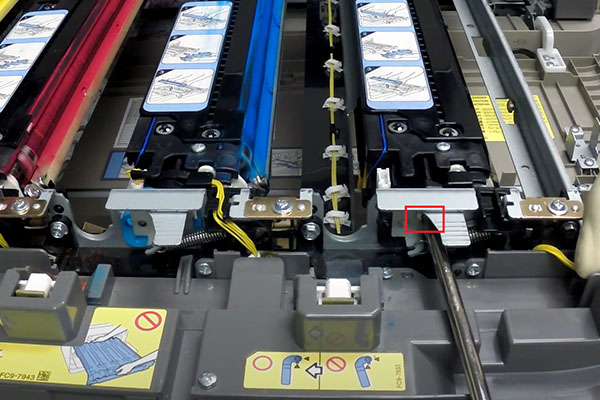
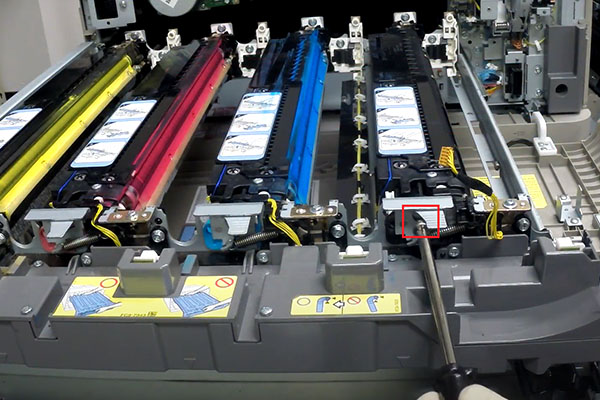
Step Ten: Unscrew Developing Assembly Stopper
Remove the screw that is holding the developing assembly stopper.
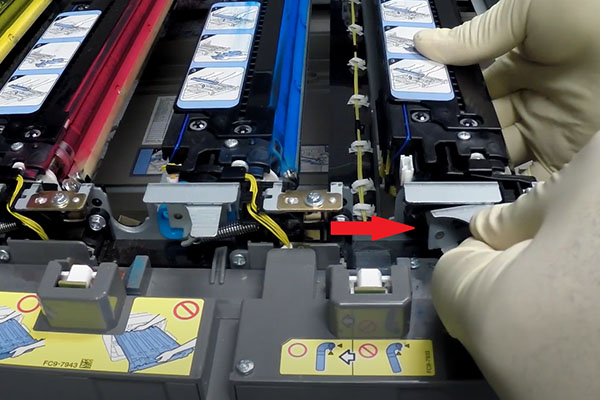
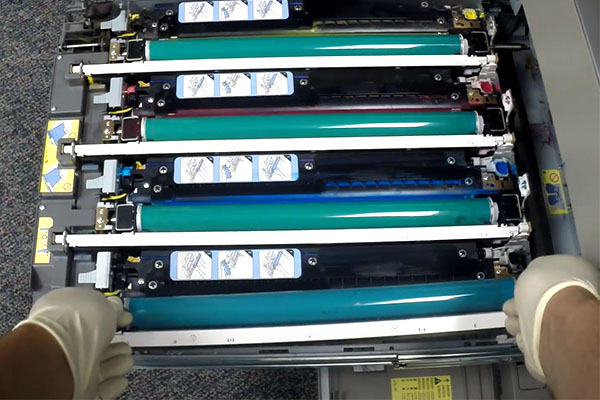
Step Eleven: Remove Developer Units
It is not necessary to fully remove the stopper for developer assembly removal. Instead, remove the knobs situated on the opposite side of the developer assembly, followed by carefully pulling upward. Repeat this process for all developers as needed.
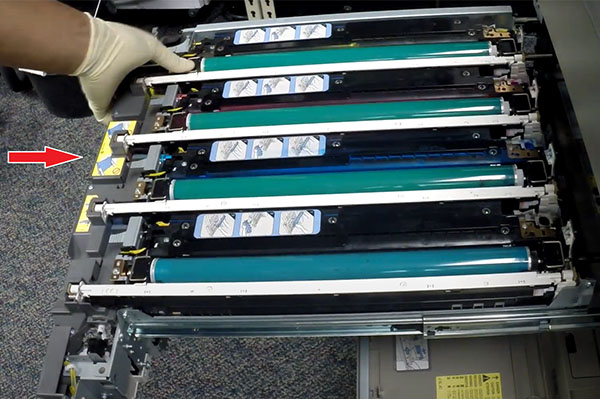
Step Twelve: Installing New Developer Units - Right Side
To correctly install the developer assembly, it is important to follow a precise procedure. Begin by inserting the two metal knobs into the plastic developer holder located within the process unit.
Step Thirteen: Installing New Developer Units - Left Side
Find two corresponding plastic holes where the metal stopper will be inserted. Then, install by inserting the two metal knobs into the plastic developer holder, and then align the other corner with the stopper.
Step Fourteen: Screwing Developing Assembly Stopper
Begin the process by securing the developer stopper in place using the appropriate screw.
Step Fifteen: Connect Developer Harness
Reposition the harness back into its designated placement. After successfully repositioning and connecting the developer harness, the installation of the developer unit is complete. Repeat this process for all developers as needed.
Step Sixteen: Install Drum Units
Align the previously mentioned plastic pieces, then push down from the top during installation. It is crucial to avoid installing at an angle to prevent potential damage to the shutters. Repeat this same procedure for all drum units.
Step Seventeen: Insert Process Unit
Now that we've completed the necessary steps, let's carefully insert the process unit by pushing into printer.
Step Eighteen: Lock IBT Pressure Lever
Now, rotate the IBT pressure release lever in the left direction to apply pressure.
Step Nineteen: Secure the Process Unit
Next, proceed to secure the process unit by fastening the two screws. A quick reminder: ensure to clean any residue left behind by the developer assembly or the drum unit.
Step Twenty: Installing IBT Cover
Proceed to install the IBT cover and securely tighten the two previously loosened screws.
Step Twenty-One: Insert Belt Cleaner
Let's insert the belt cleaner, ensuring it is securely locked in place.
Step Twenty-Two: Close Front and Side Doors
Finally, close the front door cover followed by securing the right-hand side cover.
Order Your Replacement Parts Today!
Congratulations! You’ve learned how to successfully and adequately replace and change your developing assembly for your Canon IR C5030. Great job!
- FM2-A766-000, FM3-8973-000, FM3-8973-010, FM3-8977-000, FM3-8977-010, FM4-8351-000, FM4-8351-010 - Canon IRA C5030 Developing Assembly, Yellow
- FM2-A767-000, FM3-8974-000, FM3-8974-010, FM3-8978-000, FM3-8978-010, FM4-8352-000, FM4-8352-010 - Canon IRA C5030 Developing Assembly, Magenta
- FM3-8975-000, FM3-8975-010, FM3-8979-000, FM3-8979-010, FM4-8353-000, FM4-8353-010, FM2-A768-000 - Canon IRA C5030 Developing Assembly, Cyan
- FM2-A765-000, FM3-8939-000, FM3-8939-010, FM3-8976-000, FM3-8976-010, FM4-8354-000, FM4-8354-010 - Canon IRA C5030 Developing Assembly, Black
Follow Us on YouTube for More Tutorials
Thank you for completing this step-by-step tutorial! We hope you found it useful. Remember to stay connected with us by following our YouTube channel and subscribing for more important content. We would love to hear from you, so please leave a comment.
Click here to view Item, Inc. YouTube channel.
Need More Help?
If you need more assistance, contact us. For sales, repair, or unsure about a part, call us, use our chat feature, or email us. We're here to help in any way!