

How to replace Lexmark MS/MX321 Fuser Assembly
Unsure how to replace the fuser assembly in your Lexmark MS/MX321? We'll show you step by step how to do this necessary maintenance to keep your unit running smoothly.
The following tutorial is for these models:
- Lexmark B2338dw, Lexmark B2442dw, Lexmark B2546dw, Lexmark B2650dw, Lexmark M1242, Lexmark M1246, Lexmark M3250, Lexmark M3350, Lexmark MB2338adw, Lexmark MB2442adwe, Lexmark MB2546adwe, Lexmark MB2650adwe, Lexmark MS321dn, Lexmark MS421dn, Lexmark MS421dw, Lexmark MS521dn, Lexmark MS531dw, Lexmark MS621dn, Lexmark MS622de, Lexmark MS631dw, Lexmark MS632dwe, Lexmark MX321adn, Lexmark MX321adw, Lexmark MX421ade, Lexmark MX521ade, Lexmark MX521de, Lexmark MX522adhe, Lexmark MX532adwe, Lexmark MX622ade, Lexmark MX622adhe, Lexmark MX632adwe, Lexmark XM1242, Lexmark XM1246, Lexmark XM3250, Lexmark XM3350
When Do You Need to Replace the Fuser Assembly?
If you're getting error messages, this may indicate it's time to replace the Fuser Assembly. Listed here are all the errors that indicate a problem:
- 920 Error- Turn off the printer, wait about a minute, and then turn it back on. If the error persists, the fuser unit may need to be reinstalled.
- 921, 922, or 923 Error- The fuser unit may not be at its ideal temperature. Make sure the printer is in an environment above 16 degrees and that there are no cool breezes near the machine.
- 121.24 Error- The printer's fuser may never have reached the fuser detection temperature. This may happen if the printer is not connected to a proper voltage outlet.
Step-by-Step Guide: Replacing the Fuser Assembly
Prior to starting, it is imperative to remember power off the device and disconnect from its power source at the back.
This step-by-step tutorial will further break down the steps to remove and replace a Fuser Assembly for the Lexmark MS/MX321. Let’s begin!
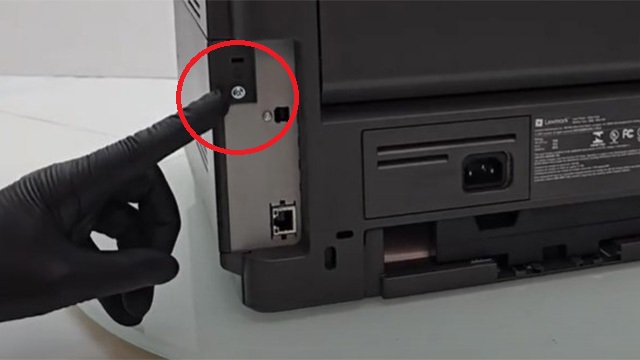
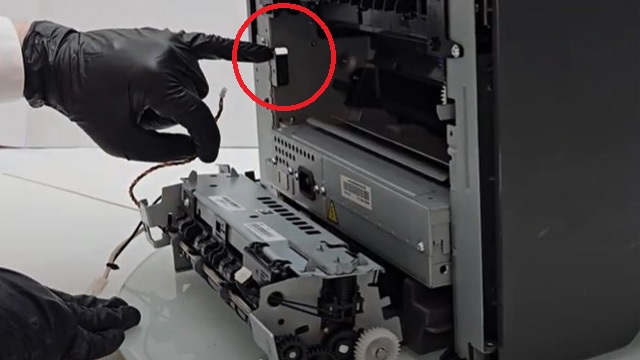
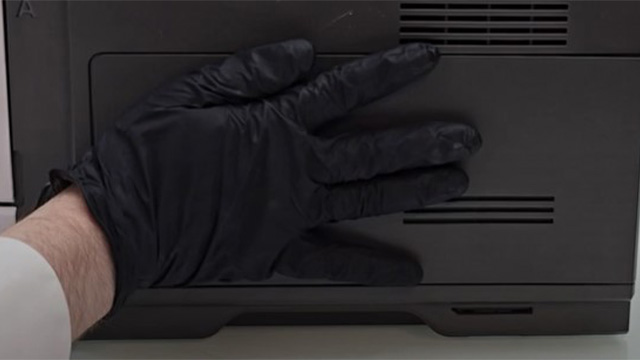
Step One: Remove Board Screw
Remove the screw holding the controller board access cover that is located on the right side of the printer.

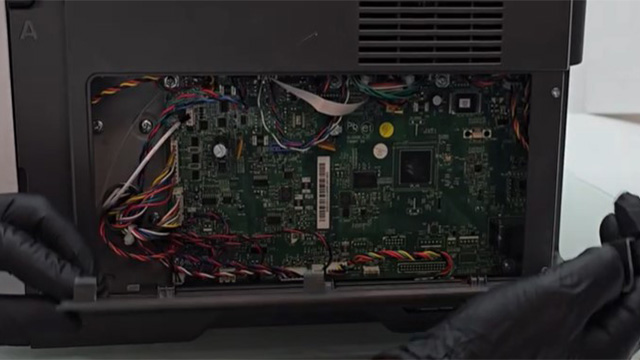
Step Two: Open Board Door
After removing the screw, open the controller board access door.
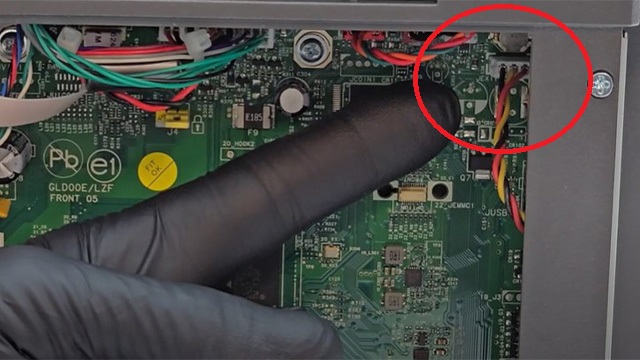
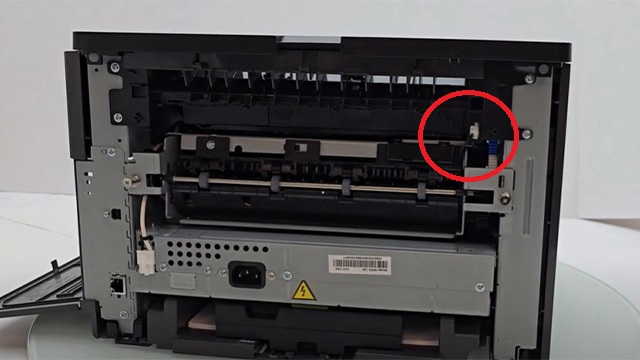
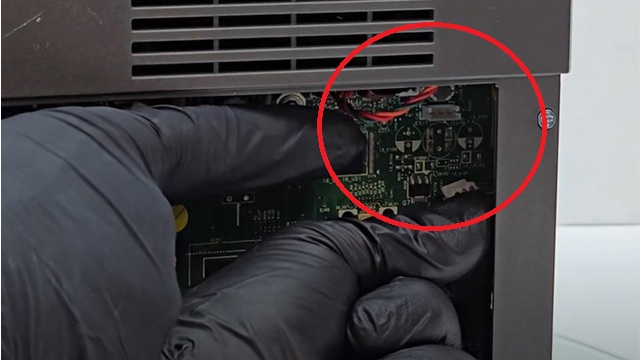
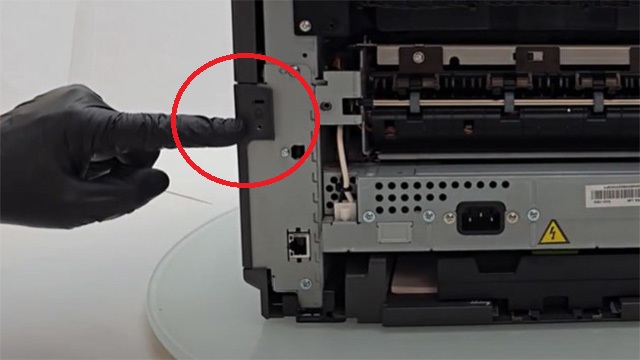
Step Three: Disconnect Fuser Cable
Disconnect the fuser cable from the controller board.
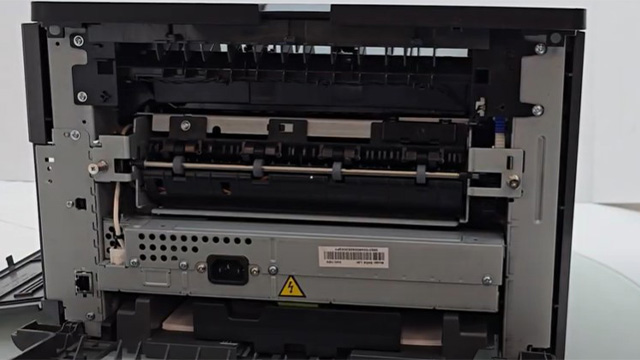
Step Four: Remove Rear Cover
Remove the rear cover by gently applying pressure up and pulling back the cover.
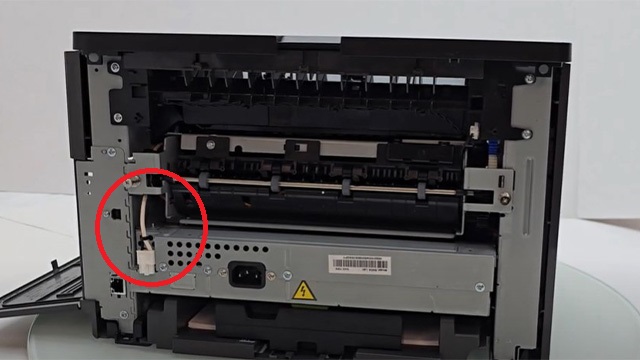
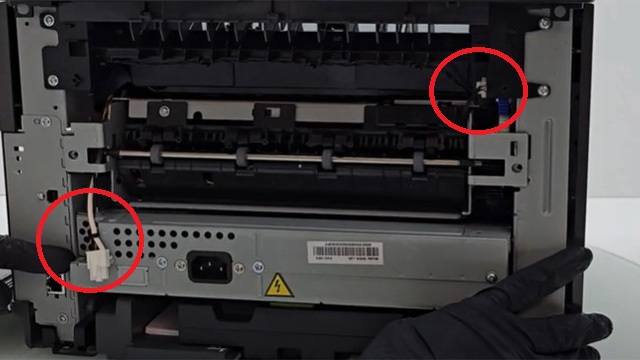
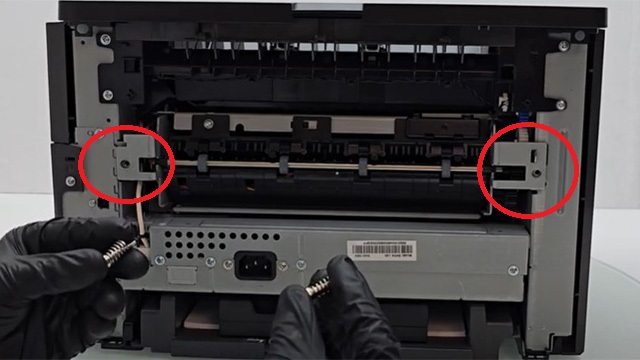
Step Five: Disconnect Exit Cable
Locate and disconnect the Fuser cable that is connected to the Exit Guide.
Step Six: Disconnect Power Cable
Locate and disconnect the Fuser cable that is connected to Power Supply.
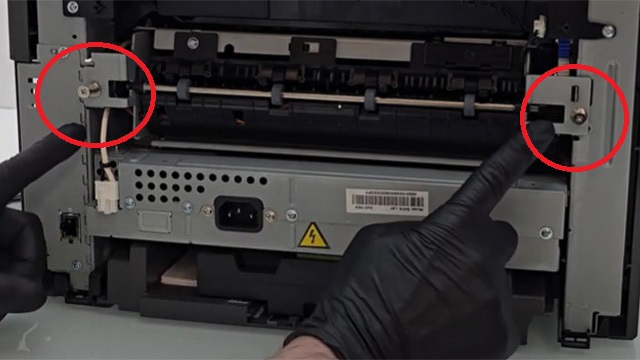
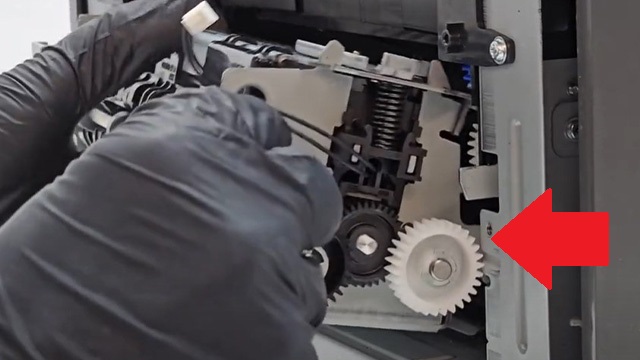
Step Seven: Remove Fuser Screws
Remove both screws on the left and right side of Fuser.
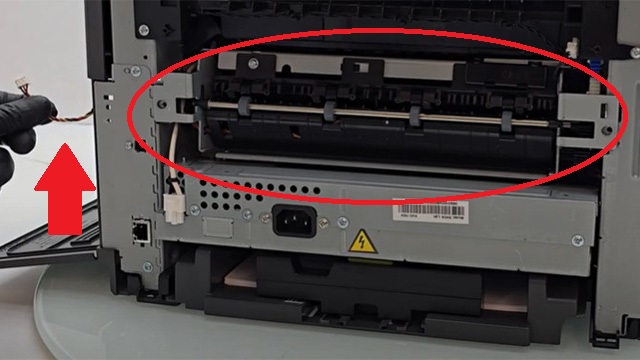
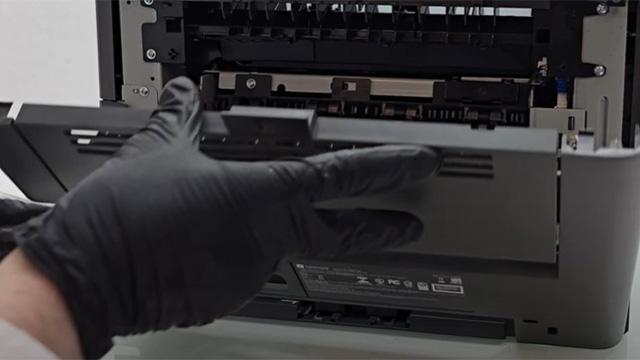
Step Eight: Remove Fuser
To remove the fuser, carefully slide out from the printer making sure the cable is free.
Step Nine: Insert New Fuser
To insert the new Fuser, begin by feeding the fuser cable through the slot.
Step Ten: Slide In Fuser
Carefully slide in the fuser by aligning it with the tracks inside the printer.
Step Eleven: Reconnect Exit/Power
Reconnect the fuser cables to the Exit Guide and Power Supply.
Step Twelve: Reconnect Controller Cable
Reconnect the fuser cable to the Controller Board.
Step Thirteen: Close Board Door
Once the fuser cable is connected to the Controller Board, the door can be closed.
Step Fourteen: Fasten Board Screw
Fasten back the screw from the controller board on the back of the printer.
Step Fifteen: Replace Fuser Screws
Replace the right and left screws on the Fuser. Use a screwdriver to tighten screws.
Step Sixteen: Reinstall Rear Cover
Reinstall the rear cover by aligning to bottom tabs from the printer and closing.
Order Your Replacement Parts Today!
Congratulations! You’ve learned how to successfully and adequately replace the Fuser Assembly for the Lexmark MS/MX321!
- 41X1178 - LEXMARK FUSER ASSEMBLY, 110V
Follow Us on YouTube for More Tutorials
Thank you for completing this step-by-step tutorial! We hope you found it useful. Remember to stay connected with us by following our YouTube channel and subscribing for more important content. We would love to hear from you, so please leave a comment.
Click here to view Item, Inc. YouTube channel.
Need More Help?
If you need more assistance, contact us. For sales, repair, or unsure about a part, call us, use our chat feature, or email us. We're here to help in any way!