

How To Replace A Drum Unit On The Canon IR Advance C5030/C5035/C5045/C5051
Unsure how to replace the drum unit on your Canon IR Advance? We'll show you step by step how to do this necessary maintenance to keep your unit running smoothly.
The following tutorial is for these models:
- CANON IR ADVANCE C5030/C5035/C5045/C5051
Replacing The Drum Unit
Before beginning any technical work, power off the machine and unplug it.
Step One: Open the Front Door
Begin by opening the front door of the printer by pulling down on the door. This will give you access to the machine's internal components.

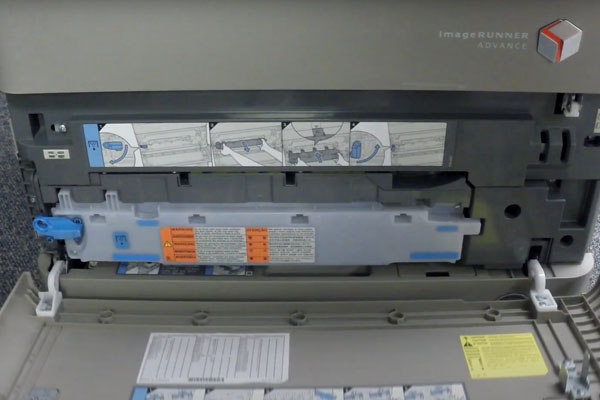
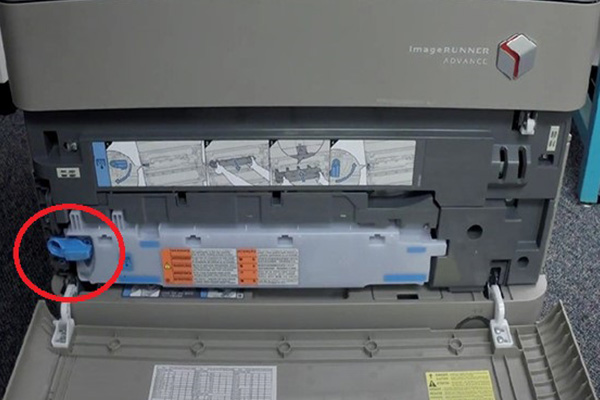
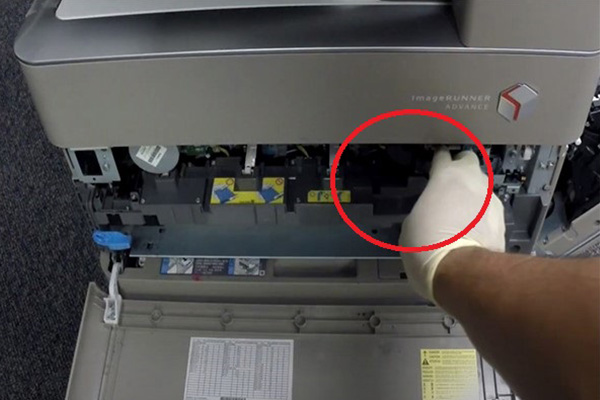
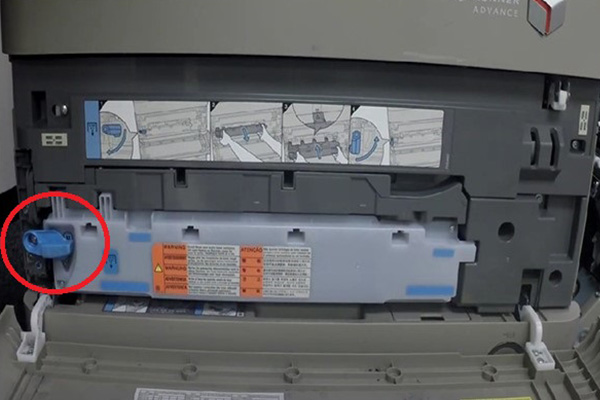
Step Two: Remove the Waste Toner Cartridge
Locate the lever on the left side and turn the lever downward to unlock the waste toner cartridge. Once unlocked, you can easily remove the waste toner cartridge from the machine by pulling it gently outwards.
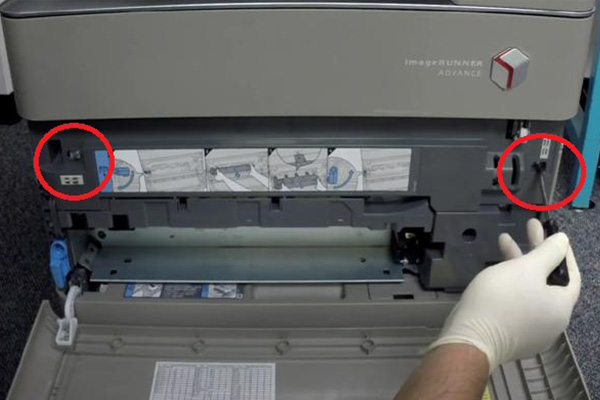
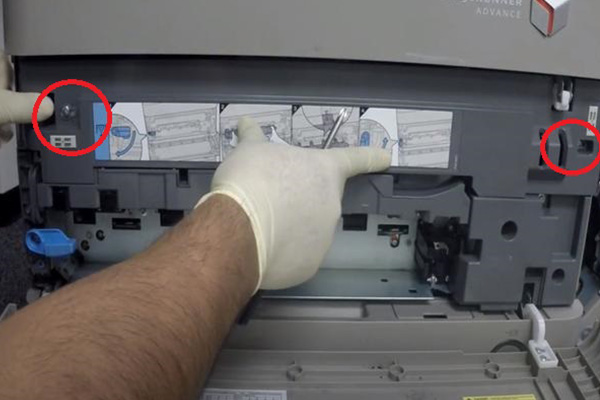
Step Three: Remove the IBT Cover
Next, you'll need to remove the IBT cover. There's a screw on the left and one on the right. Simply give them a quarter turn allowing you to slide the cover slightly to the right and remove the IBT cover by pulling outward away from the printer.
Step Four: Open the Right Hand Side Door
Locate the door on the right-hand side of the printer and pull down gently to open it.
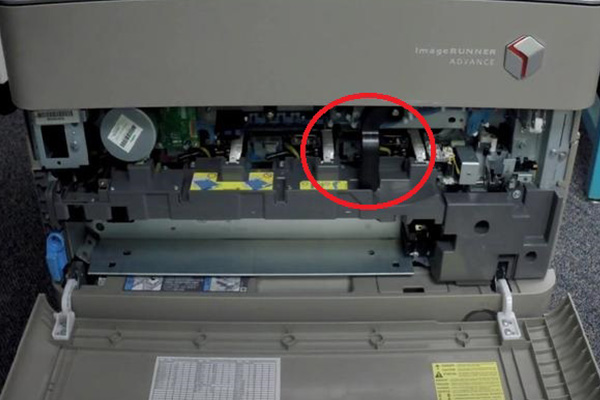
Step Five: Release the IBT Pressure
Locate the IBT pressure release lever and turn it 90 degrees upwards and counter clockwise. to release the pressure off the belt.
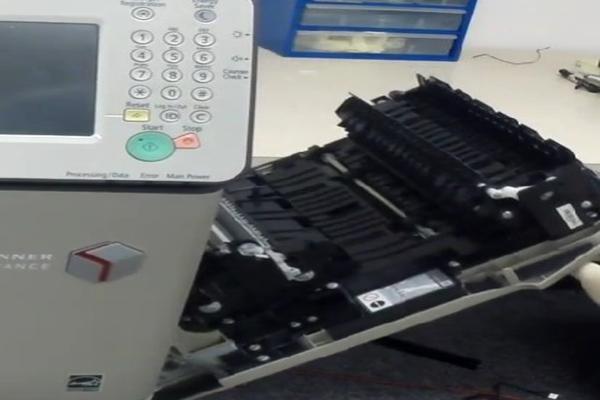
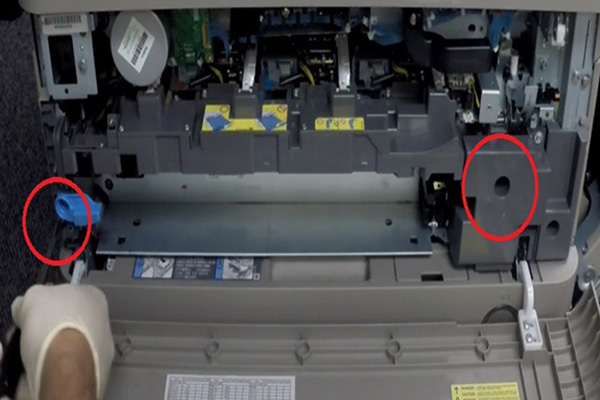
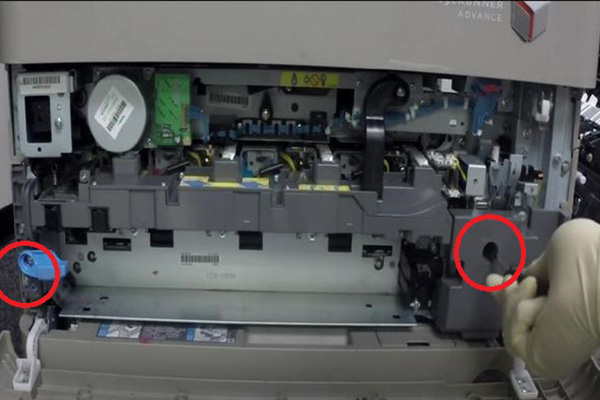
Step Six: Remove the Process Unit
The process unit is held in place by two screws, one on the right and one on the left. Remove these to screws.
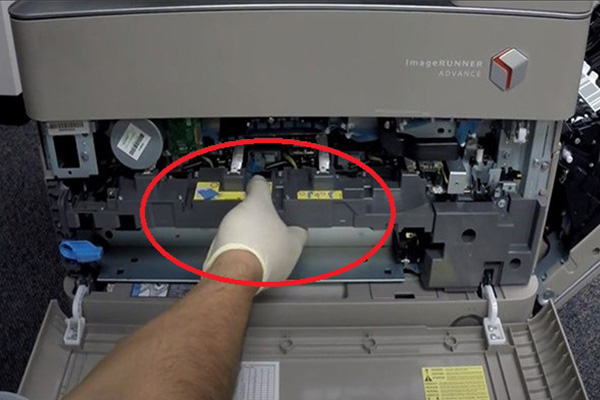
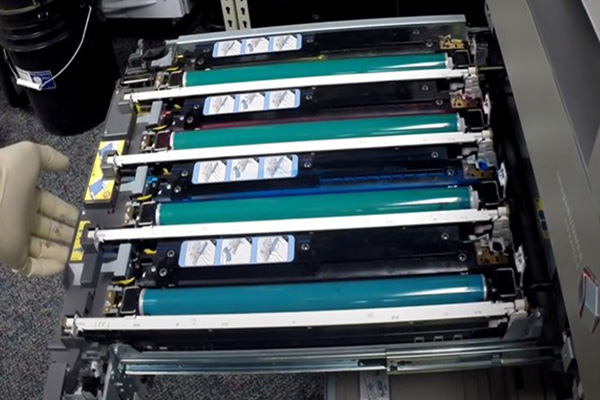
Step Seven: Pull out the process unit
Once the screws are removed, you can remove the process unit by gently pulling outwards from the printer.
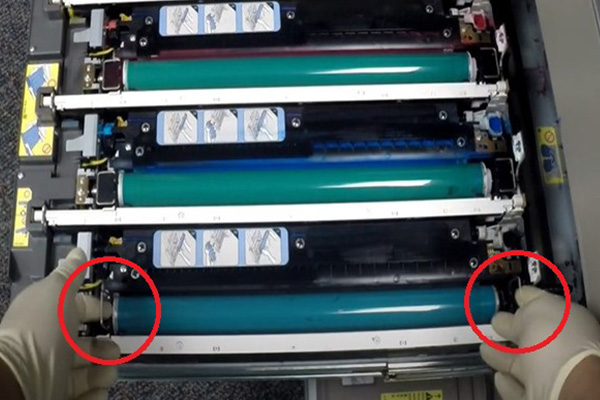
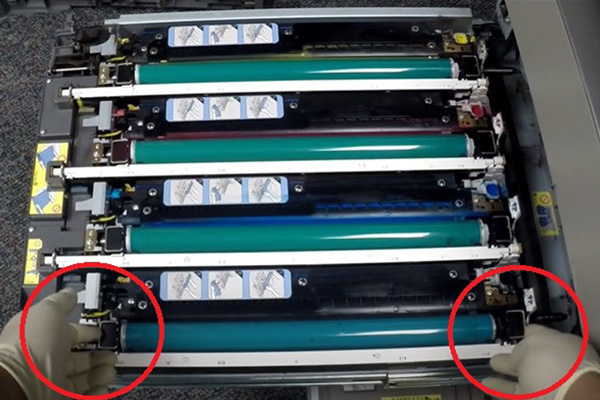
Step Eight: Remove the Drum Unit
To remove the drum unit, pull up on the two metal tabs then pull up vertically pulling the drum unit away from the printer.
Step Nine: Install the New Drum Unit
Holding the new drum unit by the two metal tabs, align the plastic pieces and push down from the top vertically into the printer. Avoid installing at an angle to prevent damaging the shutters.
Step Ten: Reinsert the Process Unit
Carefully push the process unit inward, reinserting back into the printer.
Step Eleven: Apply Pressure to the IBT
Locate the IBT pressure release lever and turn the IBT pressure release lever 90 degrees downward and clockwise to reapply pressure.
Step Twelve: Secure the Process Unit
Secure the process unit into place and then reinstall the removed screws. Clean any residue left by the developer assembly or the drum unit.
Step Thirteen: Reinstall the IBT Cover
Place the IBT cover back on and tighten the previously loosened screws by giving them a quarter turn in the right direction.
Step Fourteen: Insert the waste toner cartridge
Insert the waste toner cartridge back into its slot by sliding the cartridge inward into the printer then turn the lever to the right, locking it into place.
Step Fifteen: Close the Covers
Finally, close the front cover by lifting upwards and securing the door into place. Then lift the right-hand side cover upwards, securing the door into place.

Follow Us on YouTube for More Tutorials
Don't forget to subscribe to our channel for more video tutorials.
Click here to view Item, Inc. YouTube channel.
Need More Help?
If you need more assistance, contact us. For sales, repair, or unsure about a part, call us, use our chat feature, or email us. We're here to help in any way!