

How to change the Fixing Assembly for the Canon imageRUNNER ADVANCE 400IF
Unsure how to change the Fixing Assembly on your Canon imageRUNNER Advance 400IF? We'll show you step by step how to do this necessary maintenance to keep your unit running smoothly.
The following tutorial is for these models:
- Canon Image RUNNER 1730, 1740, 1750, Canon Image Runner iADVANCE 400iF and 500iF
When Do You Need to replace the Fixing Assembly?
If you're getting error messages, this may indicate it's time to replace the Fixing Assembly. Listed here are all the errors that indicate a problem:
- E000-0001- Fixing temperature rising error
- E001-0000- Detection of overheating of Fixing Assembly
- E001-0001- Detection of overheating of Fixing Assembly
- E001-0002- Detection of overheating of Fixing Assembly
- E002-0000- Error in temperature rising of Fixing Assembly
- E003-0000- Detection of fixing low temperature during printing
- E004-0000- Thermistor disconnection detection error
Step-by-Step Guide: Replacing the Fixing Assembly
Prior to starting, it is imperative to remember power off the device and disconnect from its power source at the back.
This step-by-step tutorial will further break down the steps to remove and replace Canon imageRUNNER 400iF Fixing Assembly. Let’s begin!
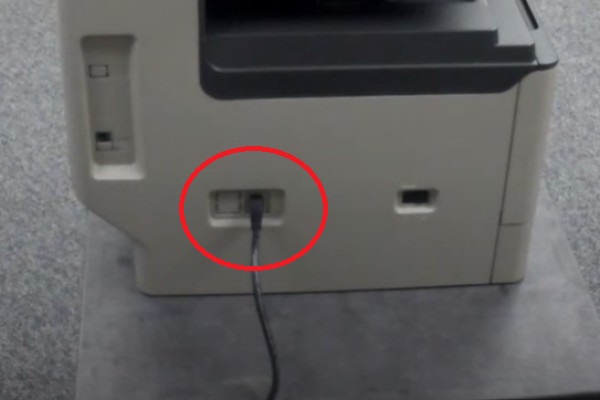
Step One: Turn off the Machine
Turn off and unplug the printer, then wait 5 minutes for the fuser to cool, ensuring safe handling.

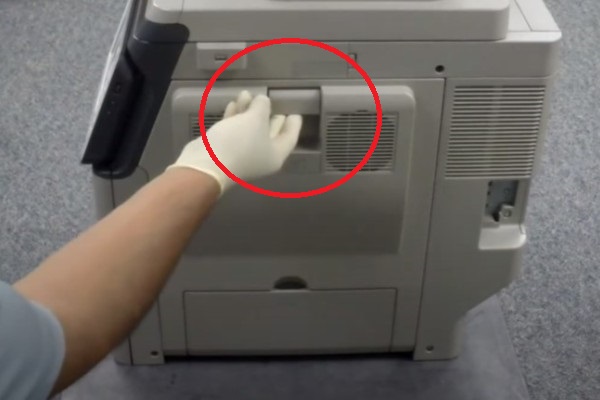
Step Two: Open the Right Side Door
To access the fixing unit, open the right side door of the machine.
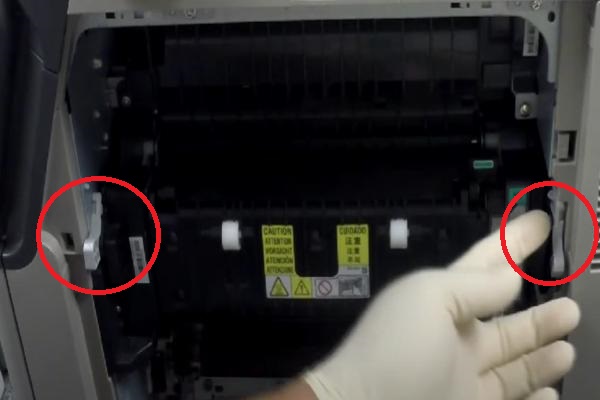
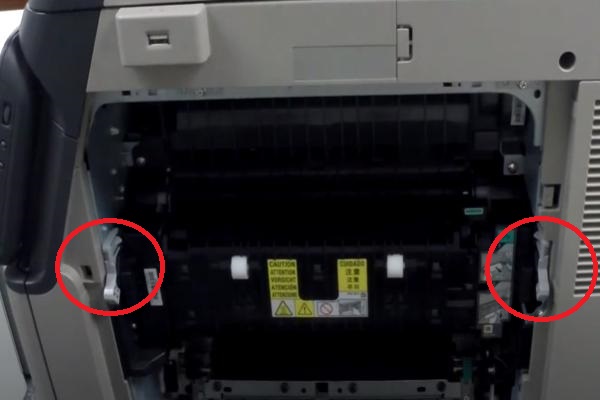
Step Three: Unlock the Fixing Unit
The fixing unit is secured by two grey tabs. Press the inside of each tab and flip the tab in an upward position, unlocking the fixing assembly.
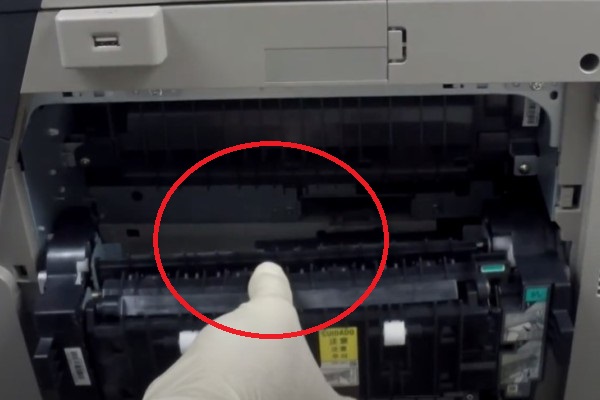
Step Four: Remove the Fixing Unit
Carefully grab the assembly and gently pull outwards away from the machine.

Step Five: Slide in the New Fixing Unit
Take the new fixing unit and slide it back into the machine in the same orientation as the one removed. Ensure it's properly aligned before pushing it all the way in.
Step Six: Lock the Fixing Unit
Once the new fixing unit is in place, bring down the grey tabs to their original position by flipping the tabs downward. They should automatically lock the unit in place.
Step Seven: Close the Machine
With the new fixing unit securely installed, close the right side door of the machine. Your printer is now ready for use.

Order Your Replacement Parts Today!
Congratulations! You’ve learned how to successfully and adequately change the Fixing Assembly for the Canon imageRUNNER ADVANCE 400IF!
- IR400IF-Z1 - Canon - Fuser Maintenance Kit, 110V
Follow Us on YouTube for More Tutorials
Thank you for completing this step-by-step tutorial! We hope you found it useful. Remember to stay connected with us by following our YouTube channel and subscribing for more important content. We would love to hear from you, so please leave a comment.
Click here to view Item, Inc. YouTube channel.
Need More Help?
If you need more assistance, contact us. For sales, repair, or unsure about a part, call us, use our chat feature, or email us. We're here to help in any way!